Configures a PrestaShop with MegaServices Valentine menu

One of the most important dates for businesses Valentine is why we prepared a lot for that day. Some businesses, such as restaurants, are filled on that date and to get more customers offer your customers the option to book your table online. Thus, customers do not have to make a phone call and can choose the menu you want to take watching all special options for that day.
By offering these options to your users, you will achieve not only increase your sales but also will work in a more organized way.
To help you set this up in your PrestaShop, we will tell you step by step guidelines that you must follow in MegaServices:
Within the product 1.Crea Prestashop .
No need to set up the product quantity and the price, because these aspects will be set later in MegaServices will have, yes, to put a striking picture and a good description of the product.
2. Create all the attributes you need.
Now you have to create the attributes and values in PrestaShop with all the options you need the product. The reservation module has millions of possible combinations. The attributes can be displayed as images, lists, etc. Select the option you like.
3. Add your product to MegaServices
The next step is to import the product created in Prestashop module reserves, putting a price and the amount of covered you have available (services) in the settings tab.
4. Set the groups
Once the product is stored in MegaServices, you can set up different groups to add all menu options. You'll have to create a group of type "Attributes" to display the attributes that we created earlier in PrestaShop. You can display these attributes in the form of buttons, images, drop-down list, as desired. In this case we will show them as a list of amounts for the customer to choose the amount of dishes you want from each, but limiting the maximum is 2, one per person.
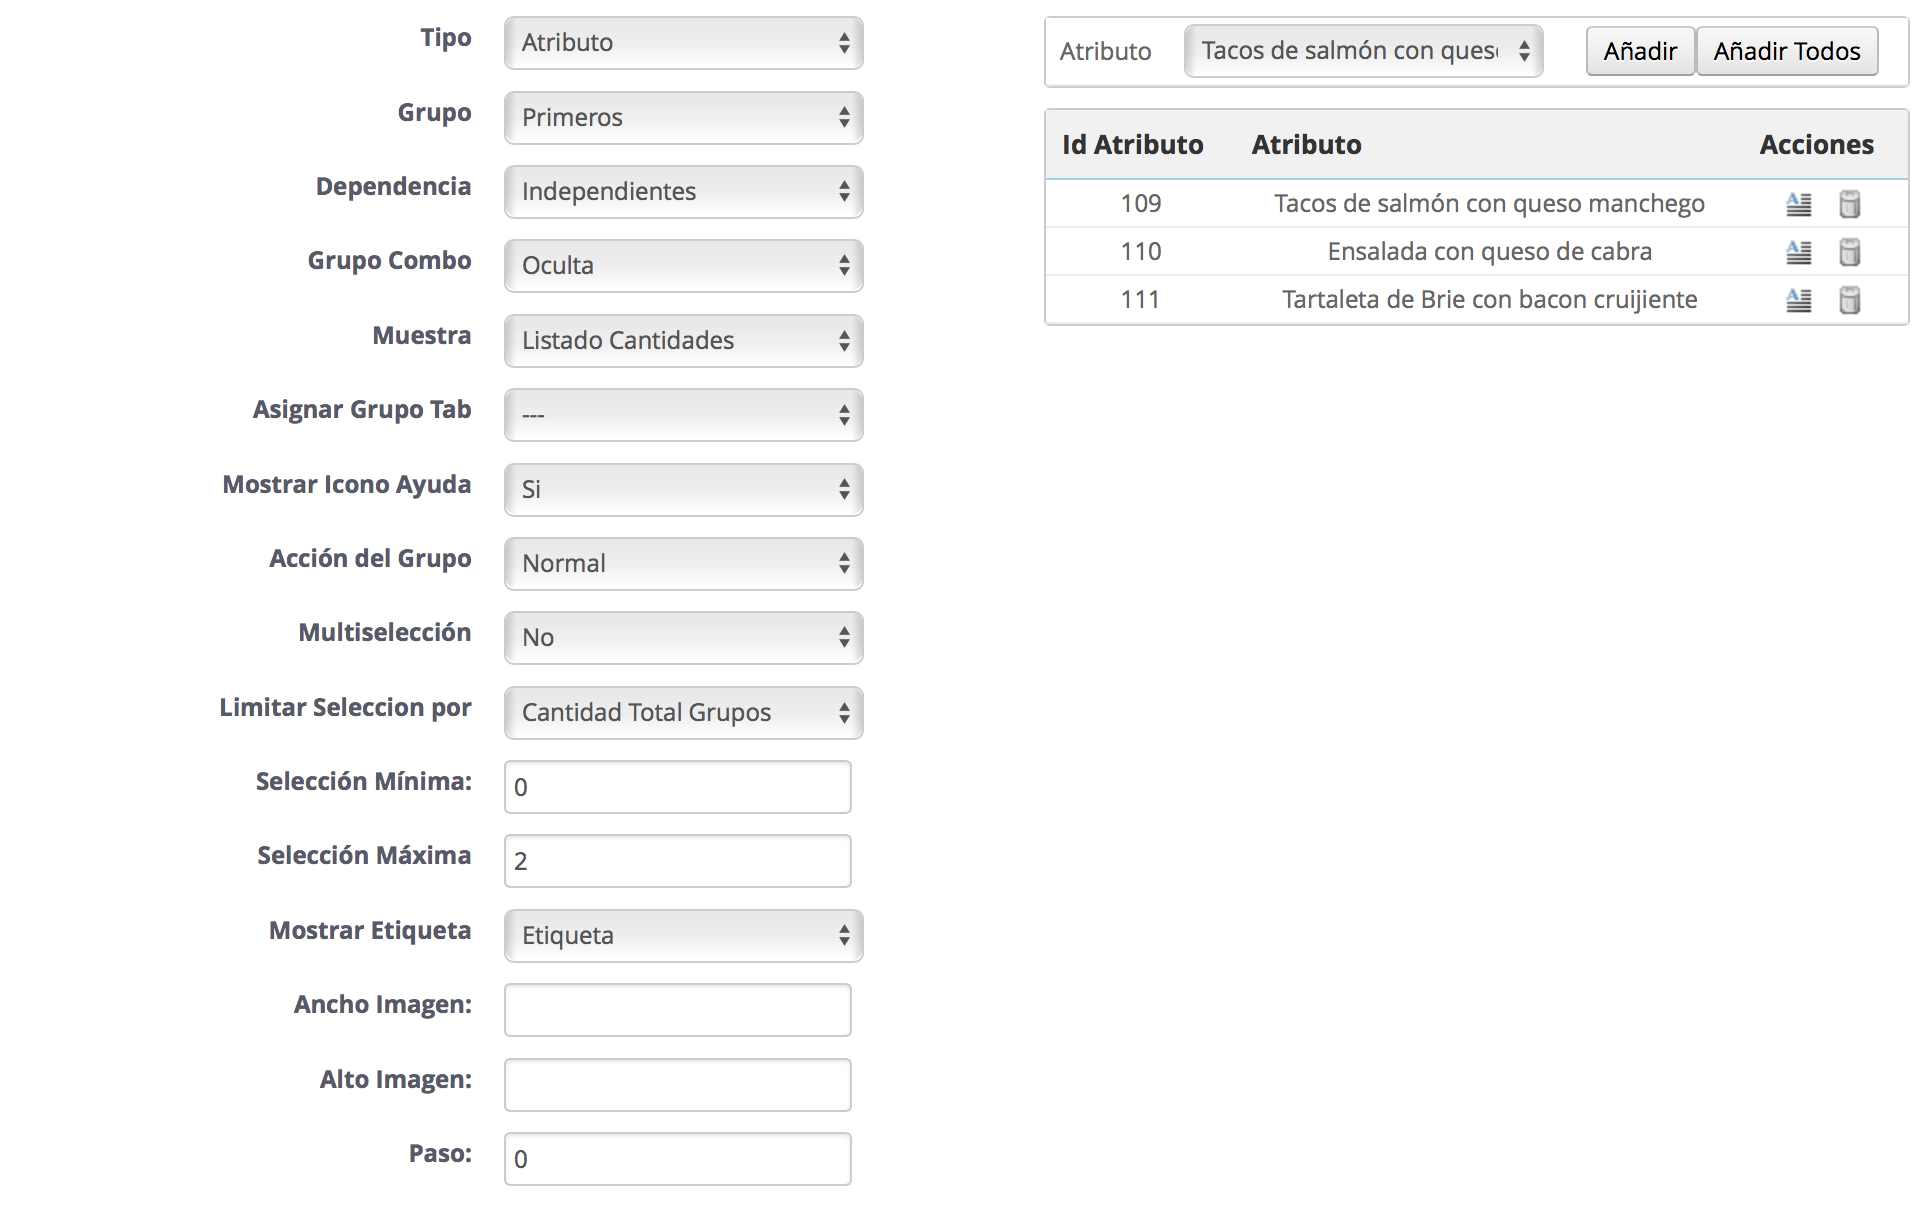
5. Add images
Now, we have decided that we want customers to see a picture of the different dishes to make them more visible and also are more appetizing. Since we want the attributes are displayed as a list of numbers, let's add the images in the description of the groups. To do this, we just have to choose the group you want, for example, desserts, and click the edit button text.
![]()
Then the next window, where you can add text, video, images ... what you need is displayed:
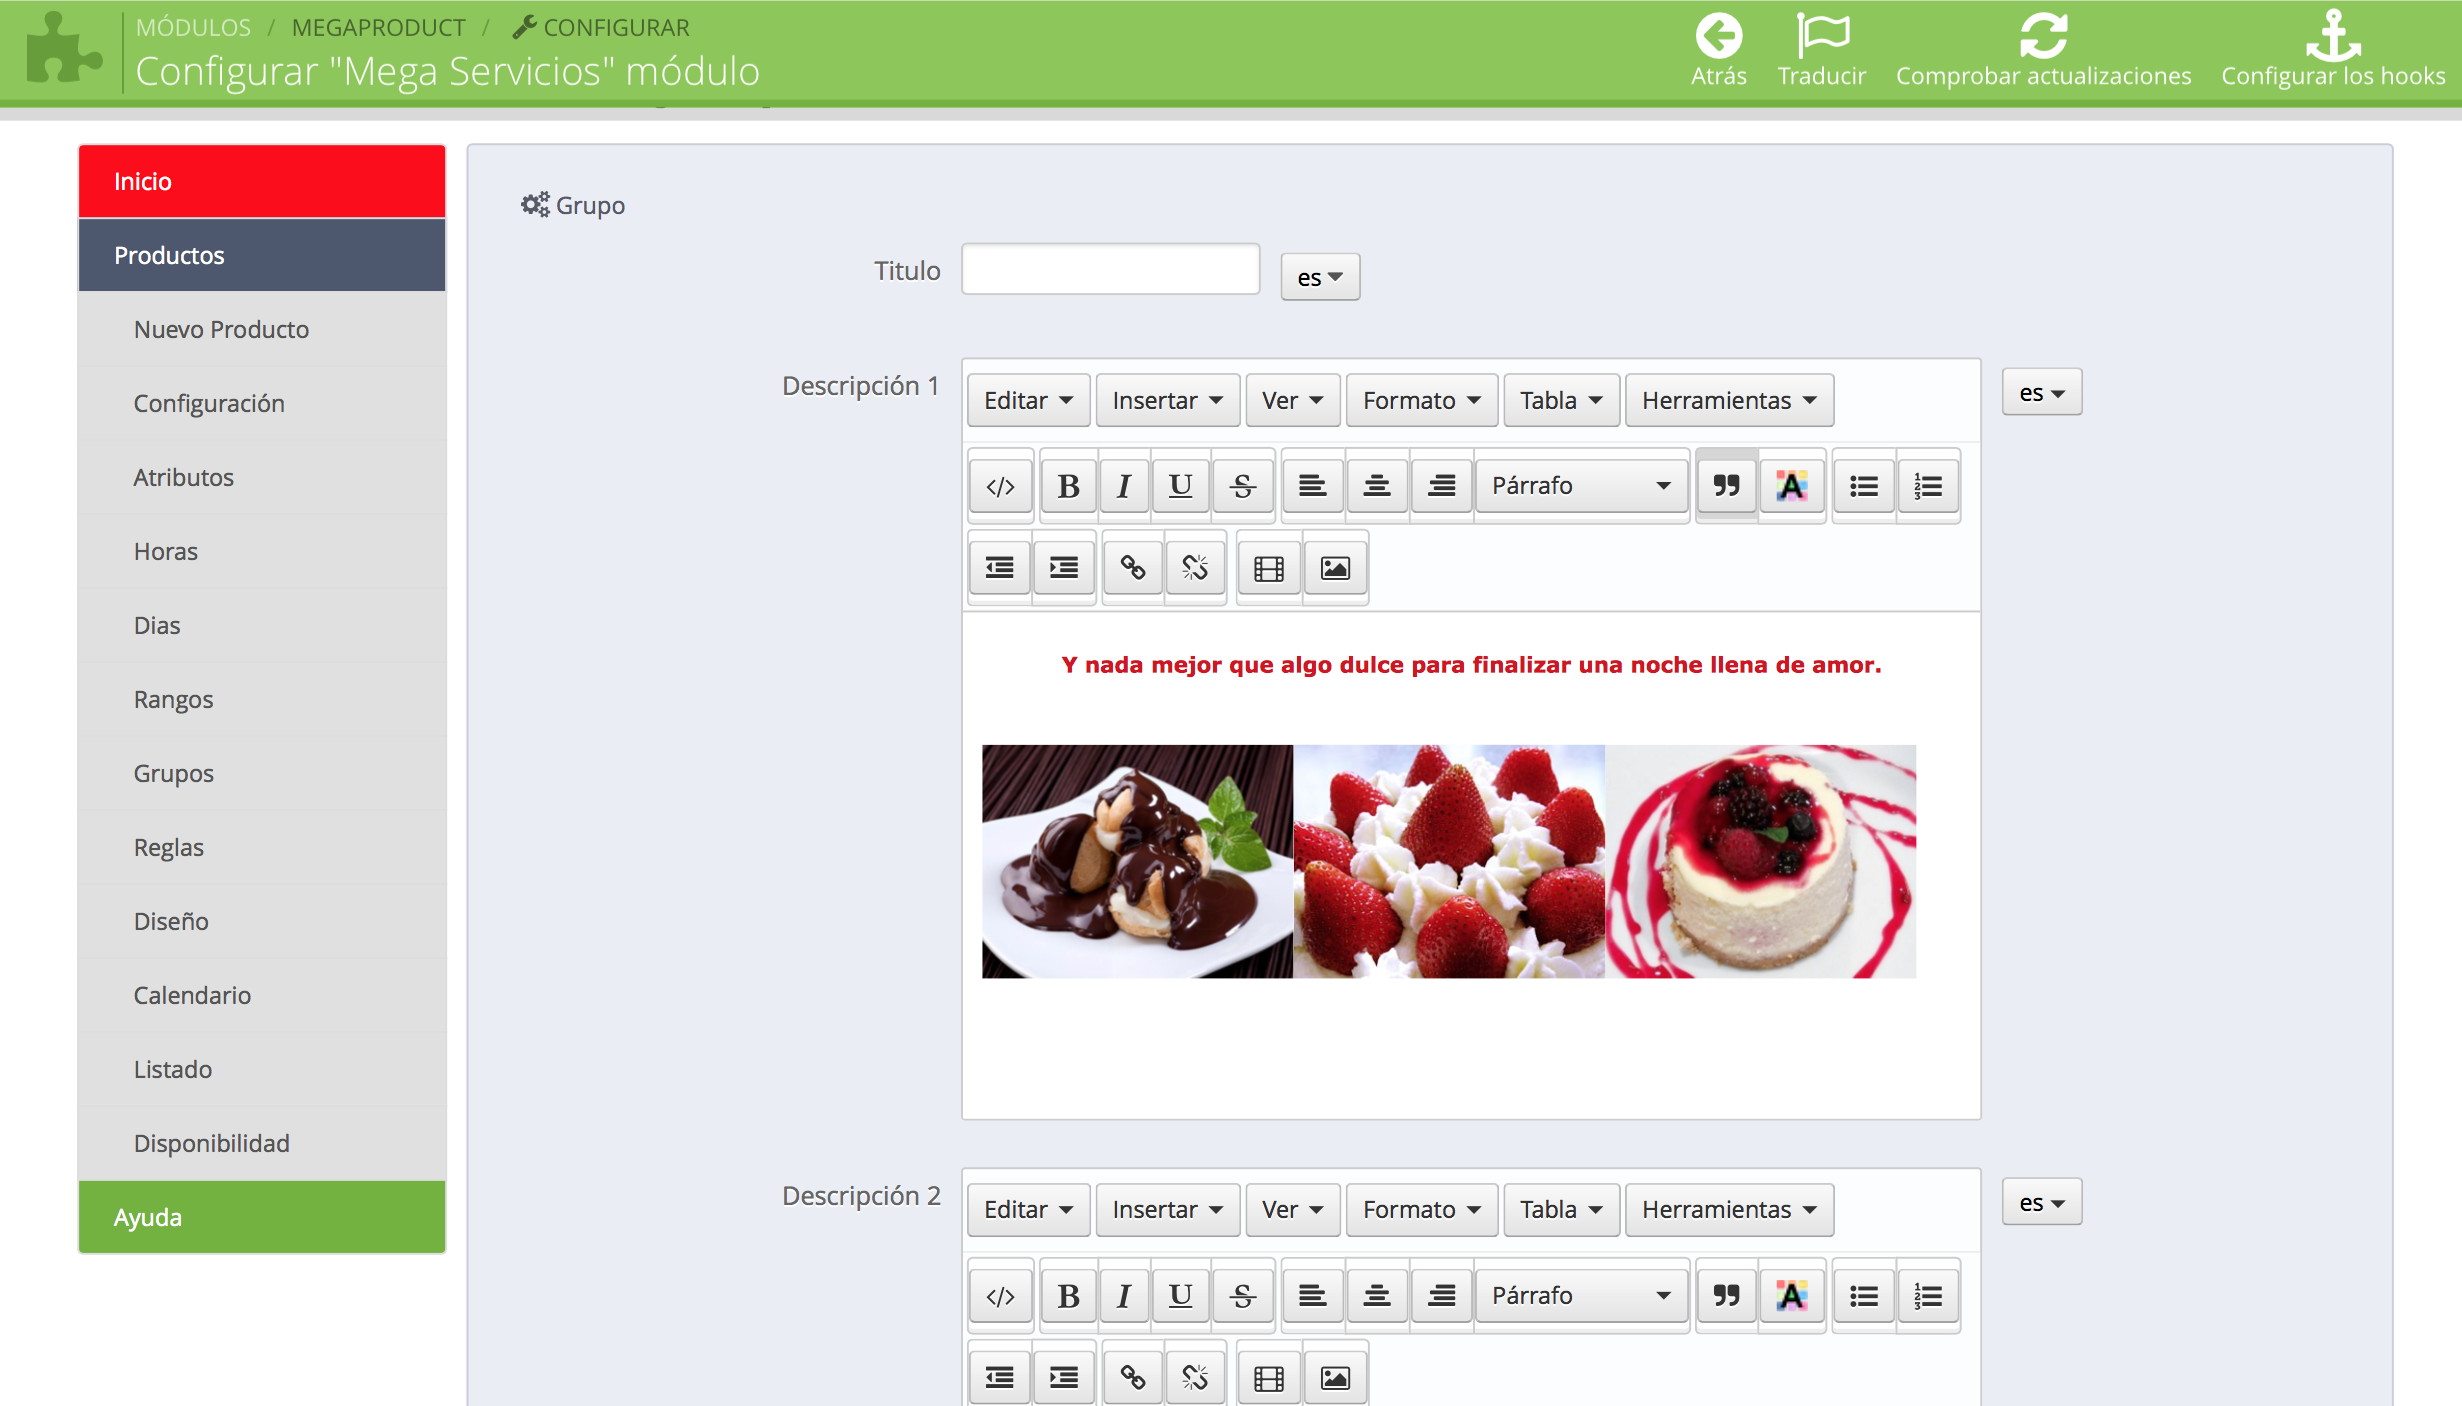
In this case we have added our desserts images and text.
6. Requests the customer data:
We will also add two other groups of customization type. In this case we will use these fields for customers to indicate their name and you will type input text (this field is a required value, ie mandatory) and one for indicating if they have any special needs on their menu and will be type textarea (will be optional).
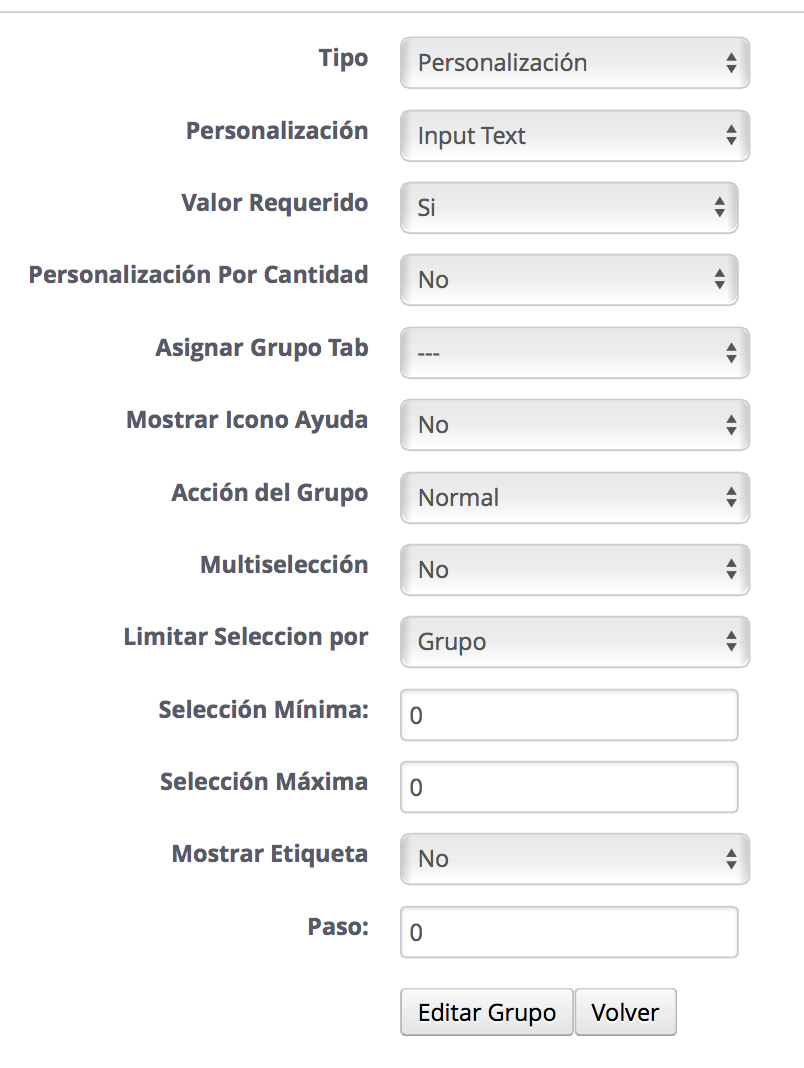
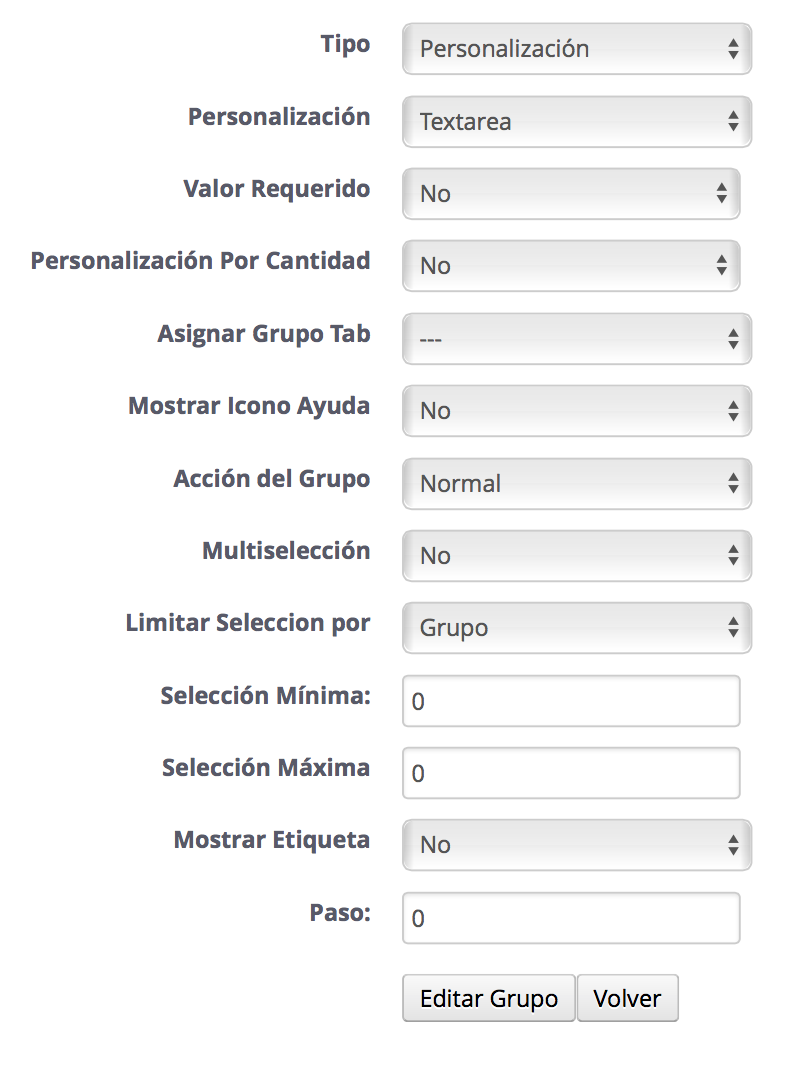
You can change the title of these fields and add your description by clicking on the edit icon text, as we have added images in groups of attributes.
7. Add a calendar and hours
Finally, let's add a group calendar and hours type, to place it in the position you want within the front office. Once all groups have added a table like this in which we can move at will the order of the groups:
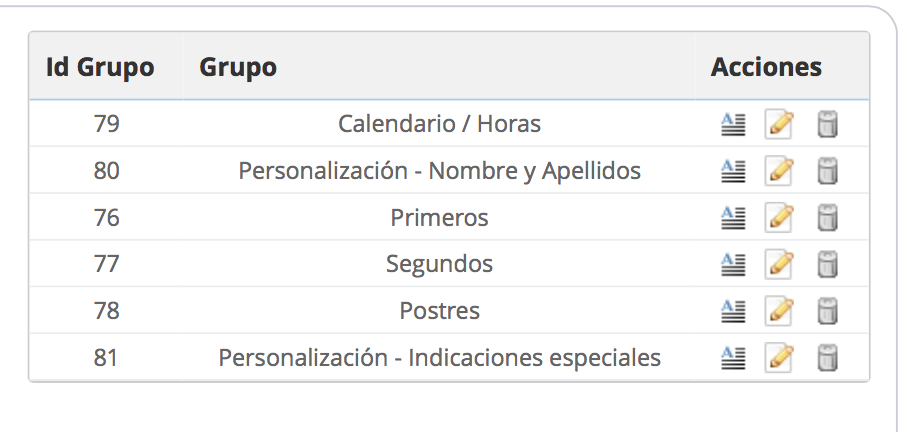
7. Limits days:
To limit the days you want this service appears, has to go to the day tab and add a kind of daily price putting the days you need to be displayed, in this case the value is 0, but you can put a price tag, also tell you that you have to mark the days of the week the restaurant is available for booking. You also have to create another field that is services and put the total services to be offering these days.
8. Set prices
Now the tab attributes touches put a price on each plate, ie to vary the amount for each election and see the possibilities there, clicking on the tab attributes into the product in the module, you must go adding each attribute you want and put each of them putting a different price.
9. Add the time available for bookings
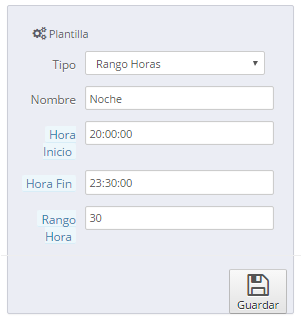
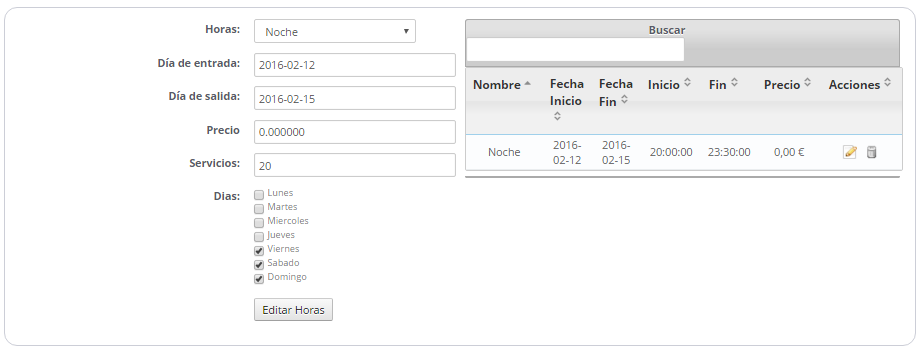
Finally, add the calendar and hours in the day tab within the module. To do this first thing to do is access the "Hours" tab within the megaservicios module and create a range of hours. Select what time you want to start the first service and the last and sets the time will each rank. In this case we have indicated that dinner will be from 20:00 to 23:30 and services go half an hour in half an hour.
Then inside the product, it should be noted that this is the list of services. For this access in the "hours" tab on the product and add the time previously created.
Then those hours to appear on the product, you need to create a group of type "time and time" on the Groups tab.
Final score
Once you have done this and has everything you need for your product and this will be the final result:
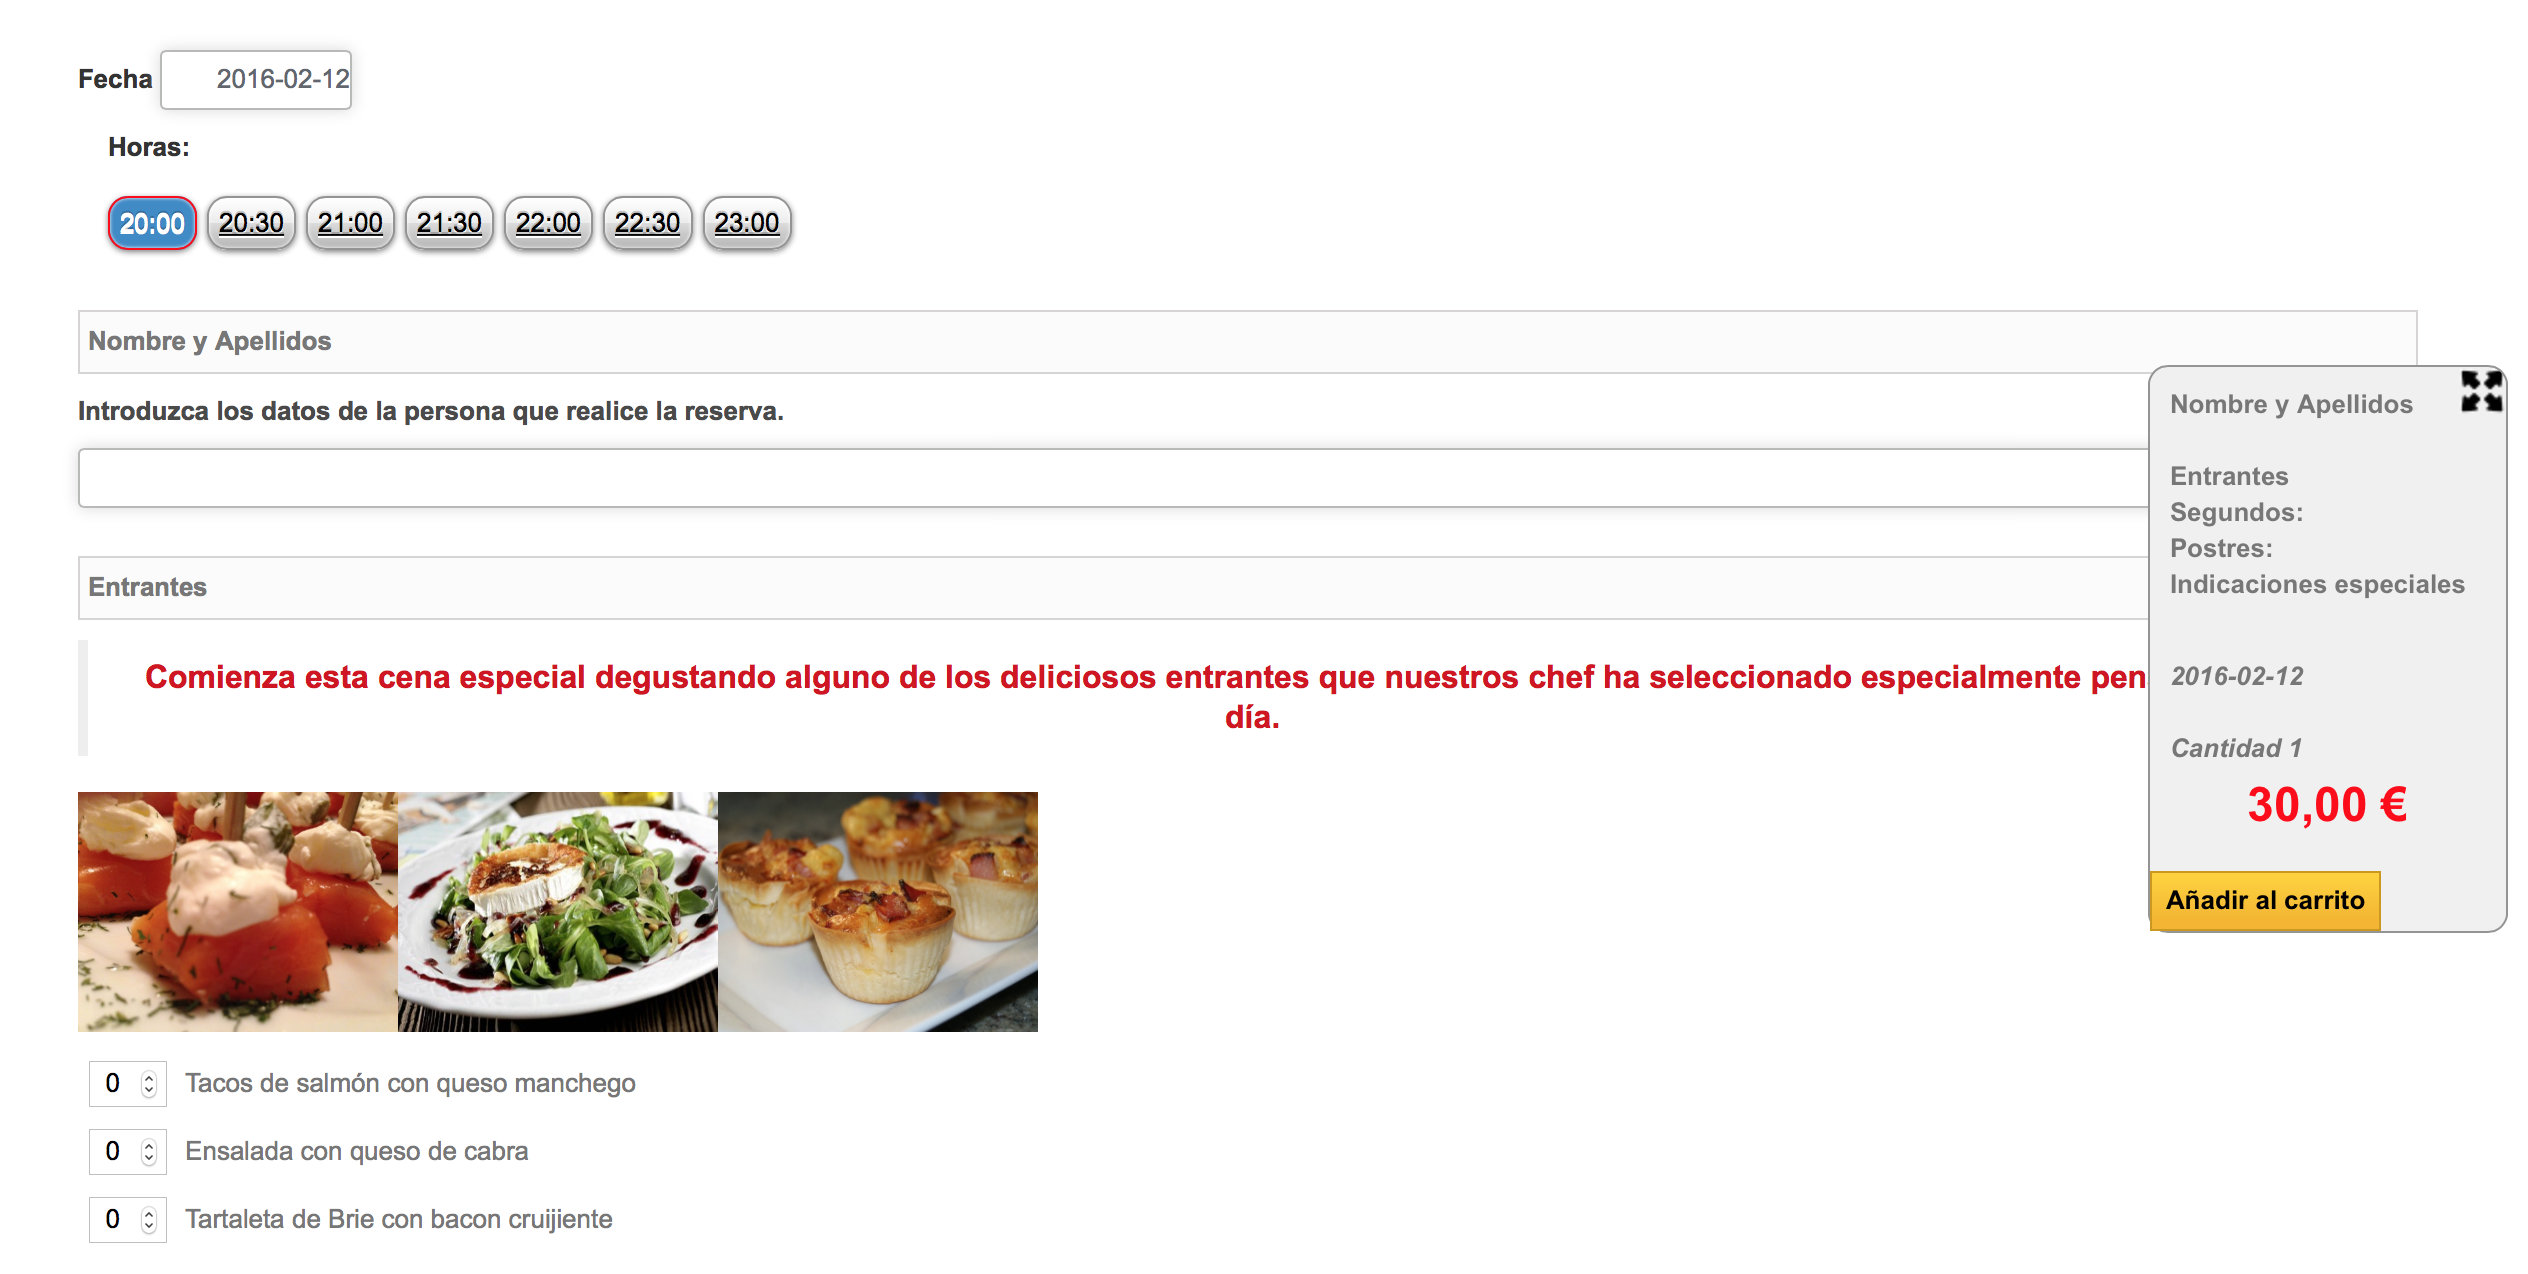
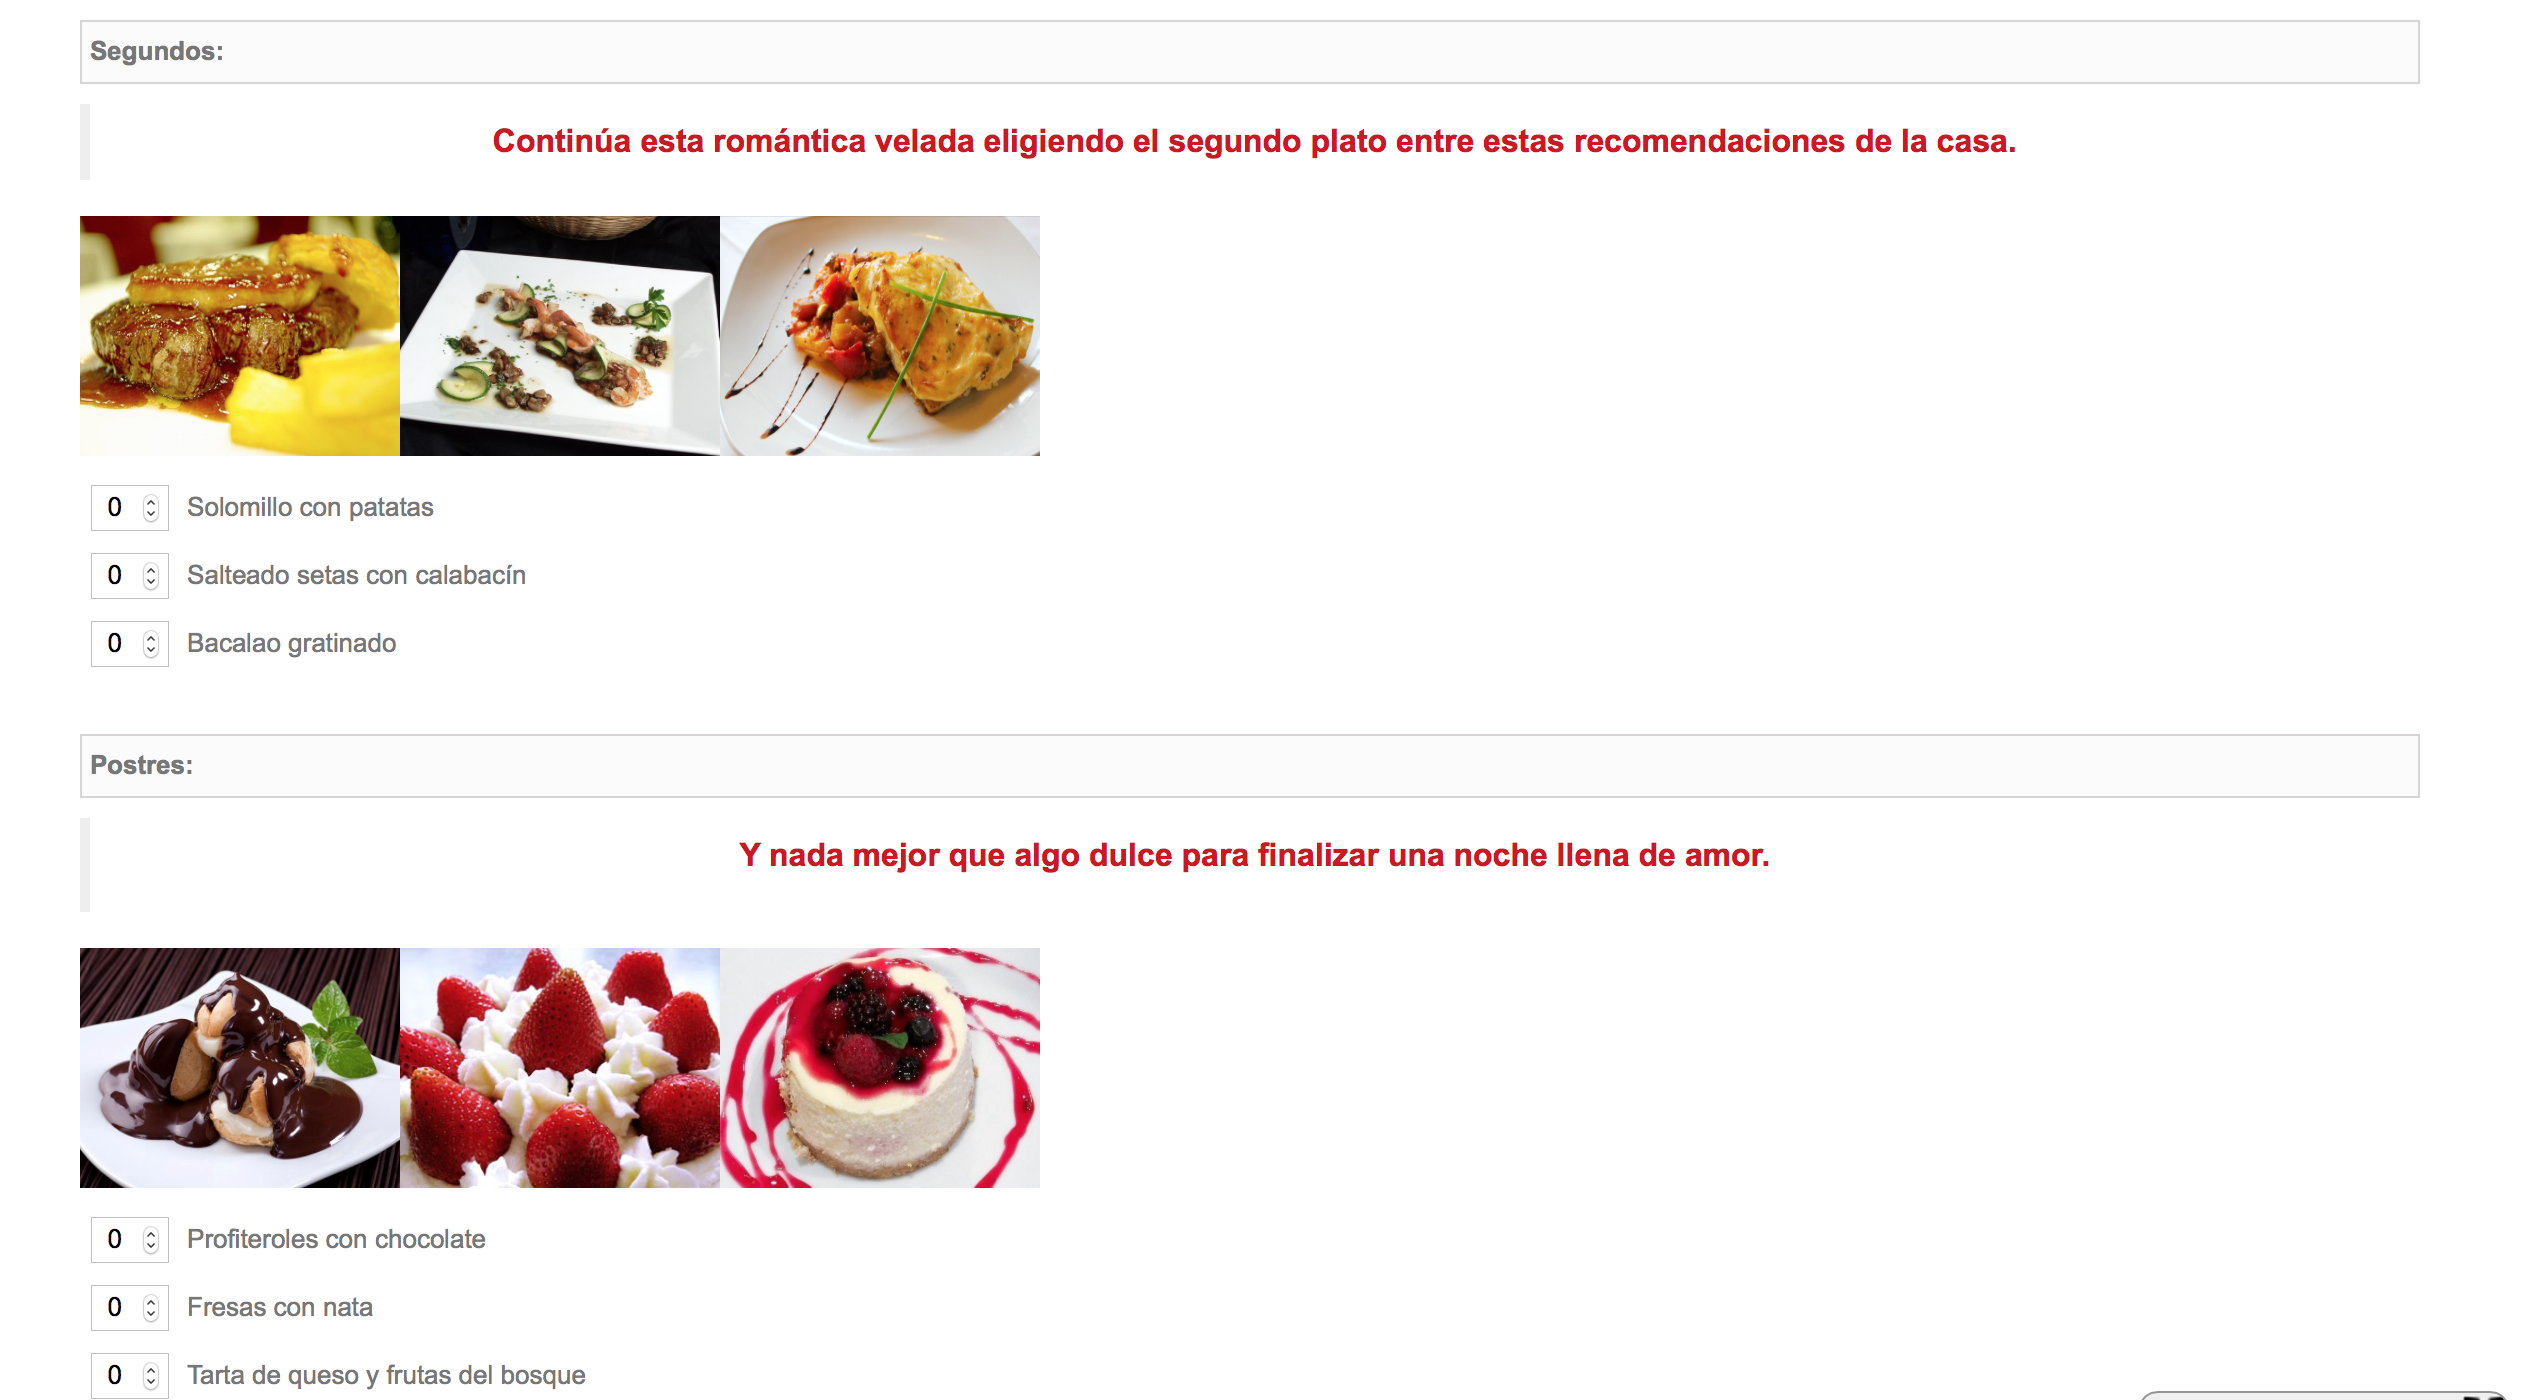

You can check the operation of these products here:
http://www.showdemo023ps.com.es/megaservicios2015/en/13-services-booking
And remember this is just one example. You can adapt the module to your needs, but here's a way to do it.
regards










Escribe un comentario