It organizes your PrestaShop 1.7 catalog into categories

Your store always ranked prestashop with categories
One of the best ways to organize the products of similar characteristics is creating categories. These will help your customers to easily find products seeking within the catalog.
The categories are managed from the page Catalog > categories. This page displays a list of existing categories, showing the information of each one of them. To view subcategories, click the parent category or select See on the actions menu.

If you click on the green check of column Visible table, it becomes a red x and the category is hidden.
You must take into account that all categories are in fact subcategories of the category of Home. To edit a category click on the arrow that there is the view button and the option of Modify.
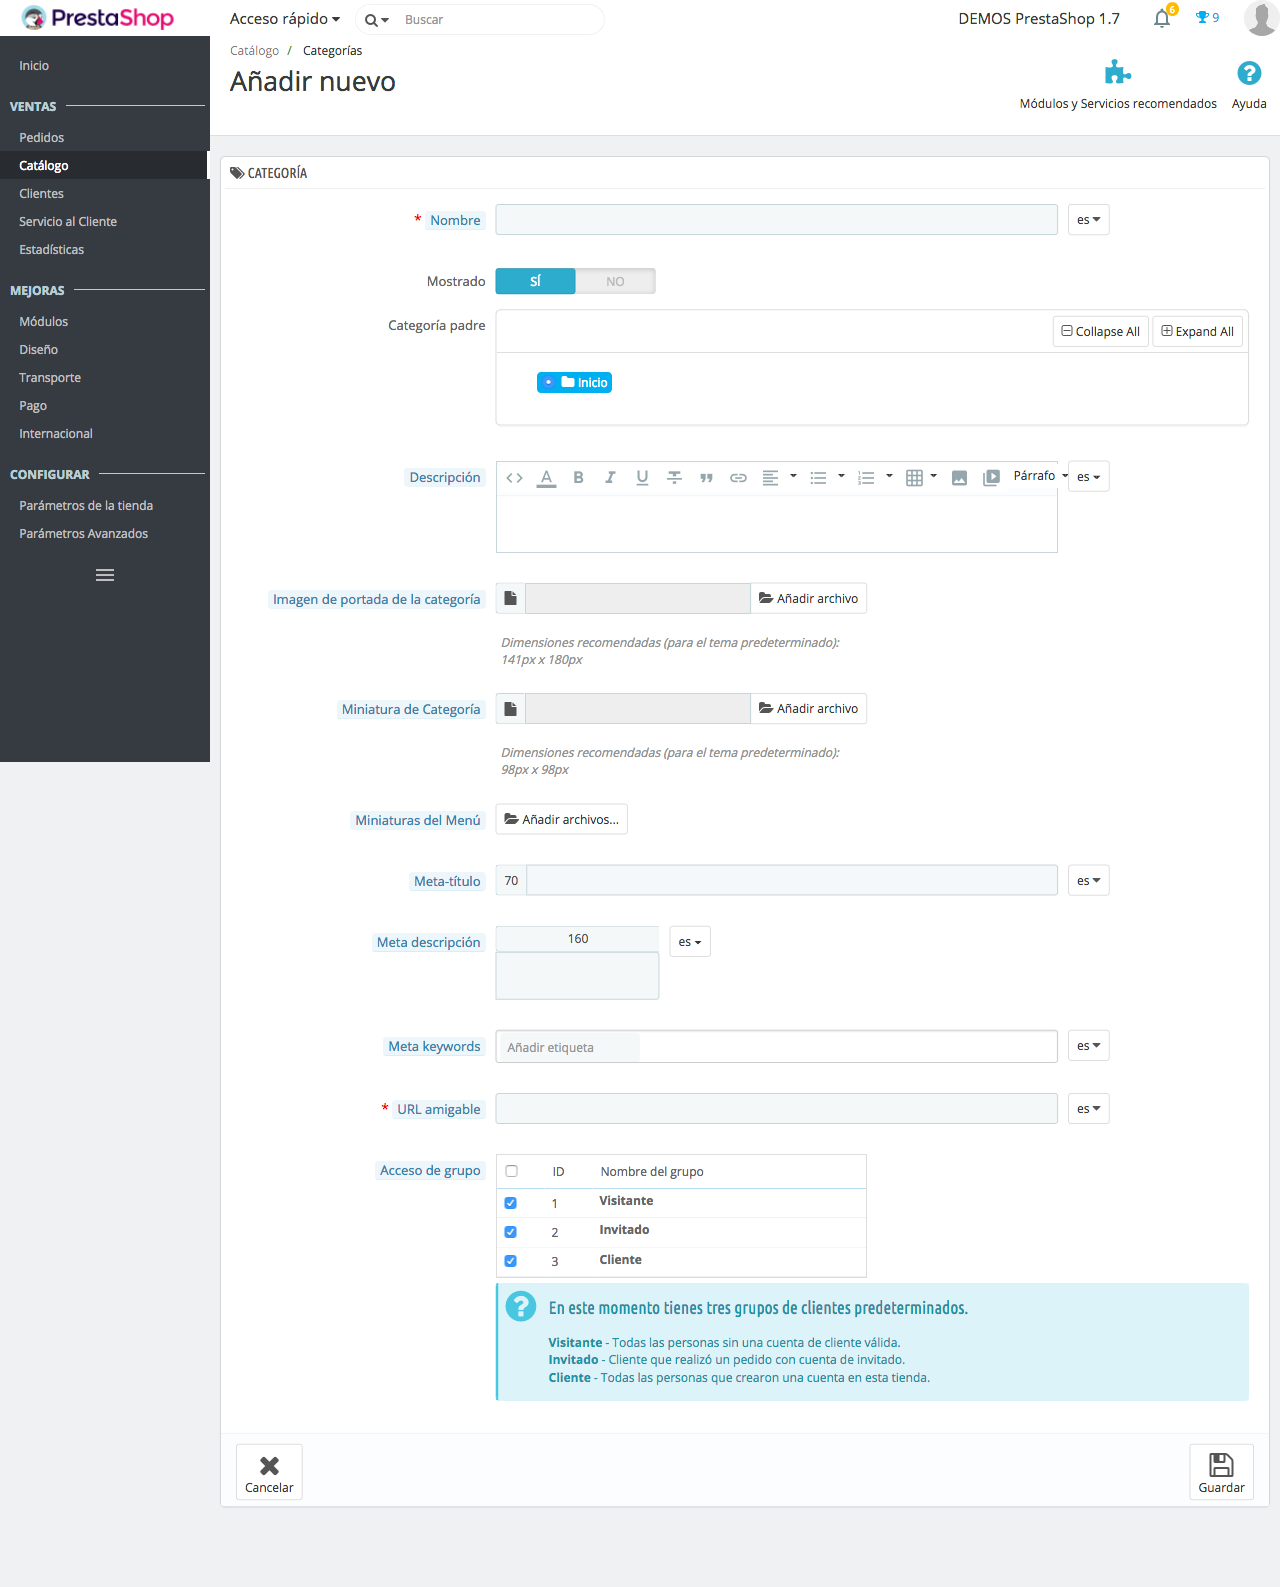
To create a new category (or a subcategory of an existing category), click the button Add new category from any level of categories. The following window where you will have to fill in all fields:

-Name. Sets the name of the category. It is important to be descriptive will help clients to know where they are within the store.
-Visible. Indicates if this category is visible, i.e., if it will be available to customers or if on the contrary you can not see it.
-Category father. This option does not appear when you create a root category. If you want to create a subcategory which belongs to a category which is not the home page, select the category that you want to appear.
-Description. In this field you must describe the category. This information will be helpful to you, your employees and your customers.
-Cover image of the category. Add an image that represents the category. Click Add file to upload an image from your computer. It will be shown on the category page.
-Category thumbnail. Displays a small image on the page of the parent category, if the subject permits.
-Thumbnail menu. It appears on the menu as a small picture that represents the category, if the template allows it.
-Meta title. The title that will appear in the search engines. You must have 70 characters...
-Meta description. This description will appear in the search engine results page. It must contain 160 characters.
-Meta keywords. Key words that define the category, to be referenced by search engines. You can enter multiple words separated by commas, as well as expressions which must be indicated in quotation marks.
-Friendly URL. You can configure the contents of the url. By default displays the name of the category, with the words separated by hyphens (-)
-Group access. You can allow or restrict access to the category and your products to certain buyers. To view these categories, buyers must belong to a user group that is allowed to access.
-Root category. It only appears when you create a root category. If you want to use this new category as the new root, rather than Home Mark this option to apply the change.
Once you've added all the information click on Save and your new category will appear in the list
If you want edit categories You must click on the button of Modify. When you click on See in any category will be opened and all your subcategories will be displayed so that you can edit them also.

Save time by importing and exporting your categories
In addition to adding new categories and edit them, on the buttons that appear at the top right of the list of categories also are other options:
-Export. You can download the list of all CSV categories.
-Import. Opens the page ' advanced parameters > Import CSV files ". You will need the CSV file to follow this format:

Assign products to its corresponding category and improves the usability of your ecommerce
Assign all your products to their corresponding category will help you not only your store more organized, if not that will also benefit the usability and your clients can more easily filter products who want to see. This addition will also be useful for SEO since search engines also take into account this information.
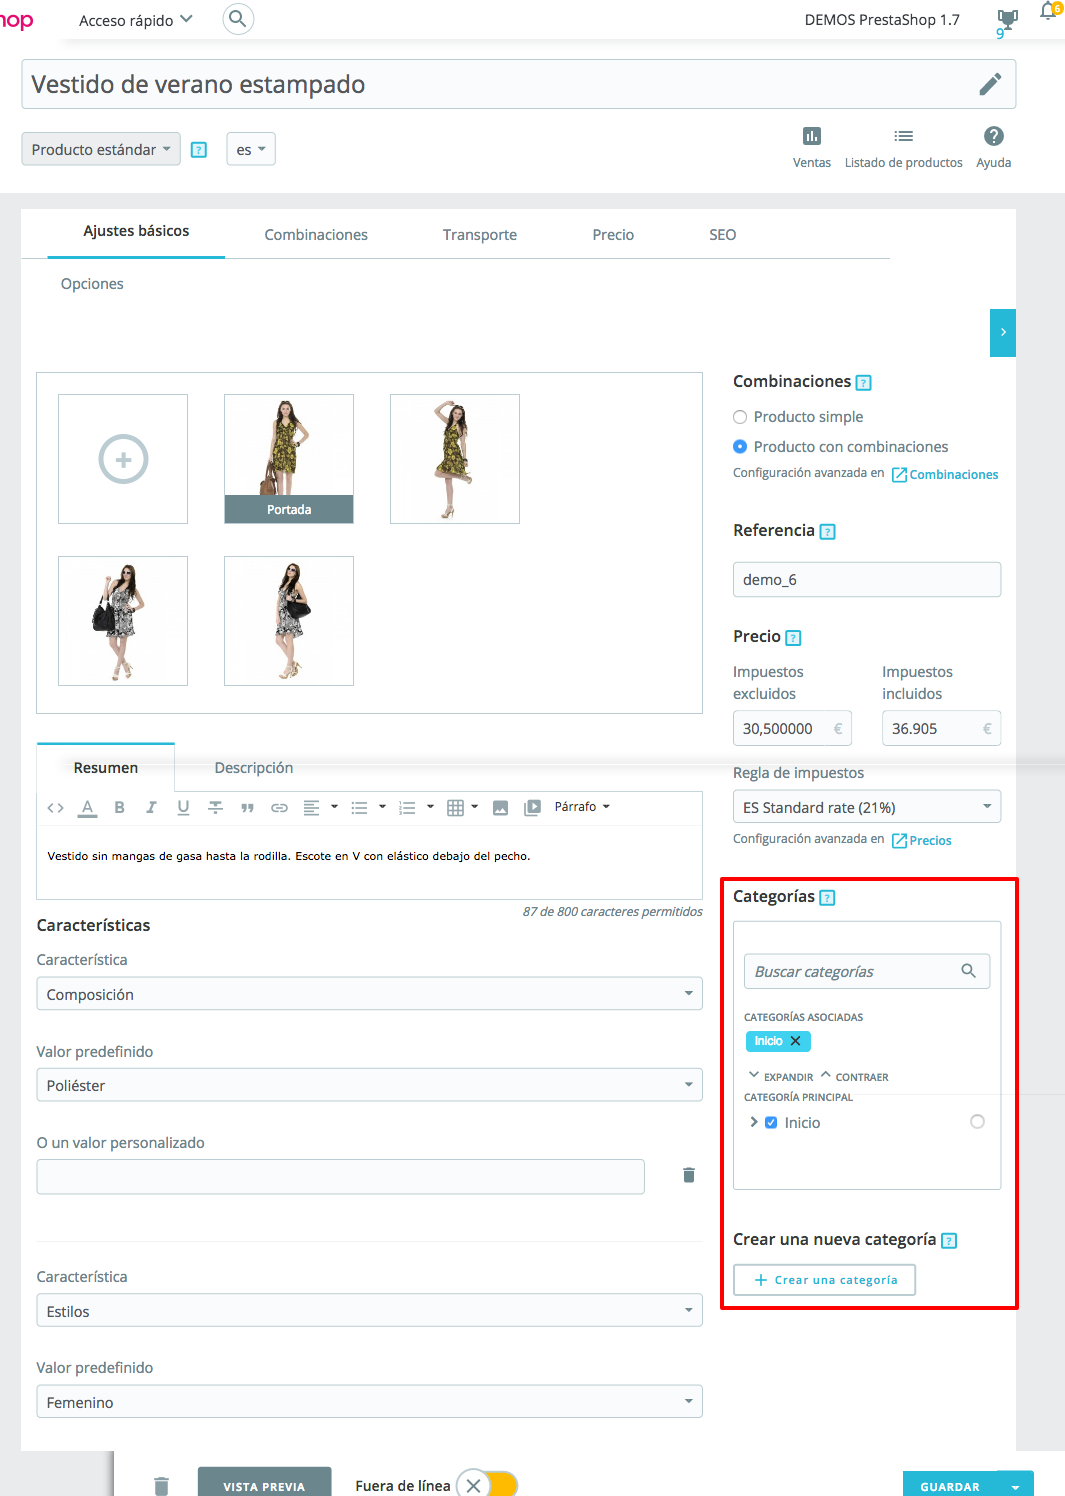
To add a product to a category in PrestaShop 1.7, you must open the page of Edition of products and go to the section Categories, tab Basic settings. Here is where you can set the categories to which the product belongs.

Now you just have to repeat this process as many times as necessary to create all your store categories. In this way you will have all your well organized products that will help you to set up filters and improve the search of the products in your store, for ti and your customers.
Remember that sit ienes any doubts you can contact us by sending a ticket from your client area in www.alabazweb.comwriting an email to [email protected] or by calling 91 874 68 57.


Escribe un comentario