create new products in prestashop 1.7
If you've opted you start to sell your products online and you have a shop in PrestaShop 1.7 this post is essential for you. Here we will explain all the steps that you must follow to add products to the catalog of your ecommerce and all of your information.

Sell all of your products in your PrestaShop shop
The first step to being able to sell your products in your online store is to create products in the catalog of your ecommerce.
Creating products in 1.7 is slightly different to the of PrestaShop 1.6 since who have tried to make it more intuitive and simple, but basically to introduce data are the same, even if change organization tabs. To create a new product just have to access to Catalog > Products and click on New.

A window will appear where you will have to begin to fill in the different fields with information of the product distributed in tabs:
-Basic settings
Combinations/amounts
-Transport
-Price
-Seo
-Options
Basic settings to create a product in PrestaShop 1.7
The first tab you will find access to the creation of a new product form are basic settings. In this image you can see all the fields it contains. You can then further information on some of these aspects in the other tabs of the form:
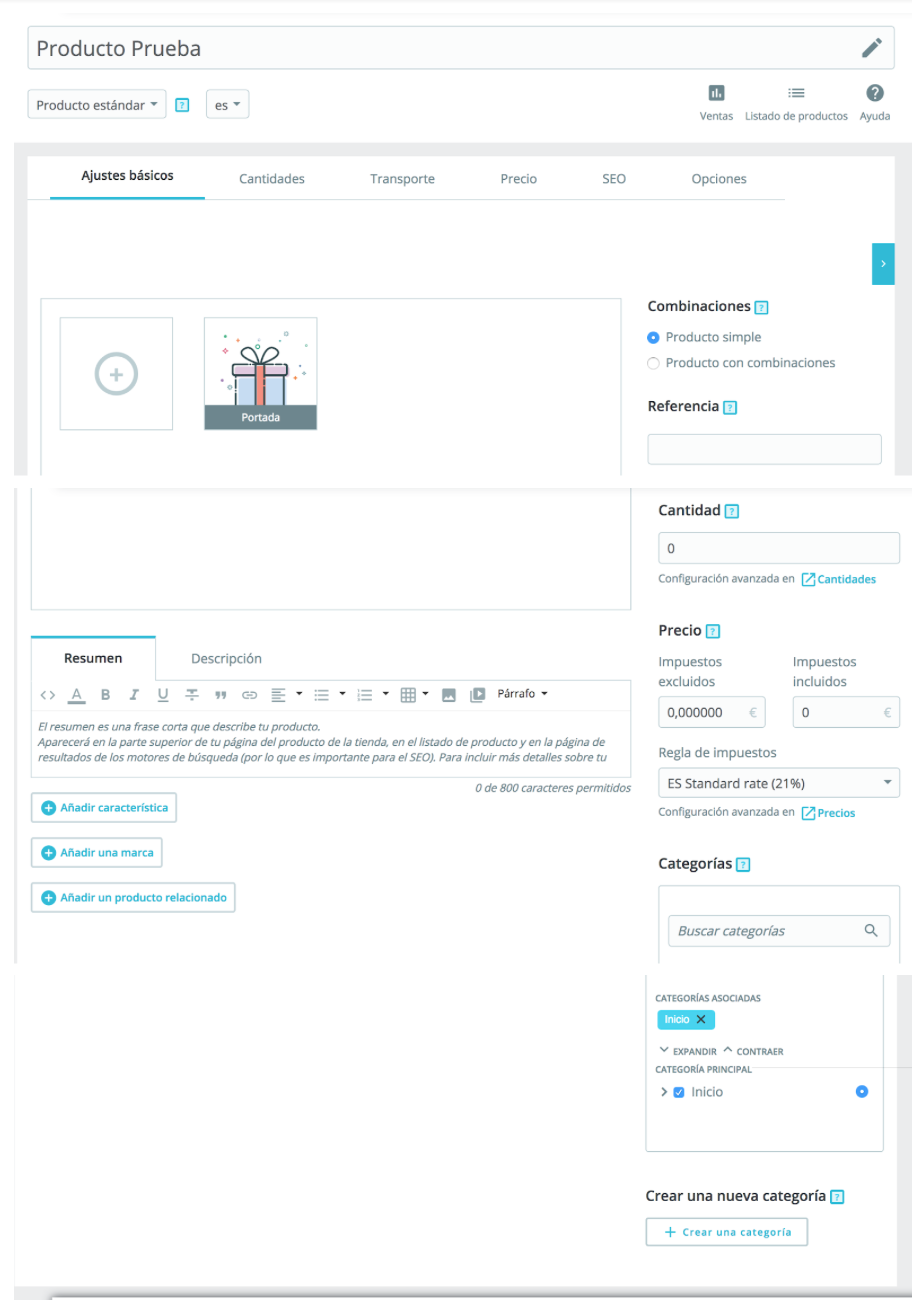
-Name: Indicates the title of the product.
-Type: Here you must specify whether your product is physical, a pack or a digital item.
-Images: Here you can upload product images from your files. The cover image will be that appear in the listings, and the rest, will be displayed on the product page.
-Combinations: Here you have to indicate if the product is simple, or if on the contrary, it has attributes that generate different combinations. If you select the product is combinations opens a tab where you will have to create such combinationsset the amounts of each variable, the reference... We will see in the corresponding tab. If you indicate that the product is normal from displayed tab of Quantities.
-Reference: Add the reference of the product barcode, EAN-13 code... which matches your product.
-Quantity: Indicates the number of available units of the product. If you have combinations of indicated by combination.
-Price: Here you can enter the base price of the product.
-Categories: Here you can indicate which categories belong the product (you can see how to add categories here). The category that marques with the point will be by default, i.e. the main category.
-Overview and description: In these fields enter the information of the product to customers. The summary must be basic information that helps the customer to know the product, while in the description you can add more concrete and specific data.
-Enabled: It says if you want the product to appear or not active in the store.
Sets the availability of your products
If you indicate that the product has no combinations, i.e. that it is a simple product, the next tab that you have to fill is the of quantities:
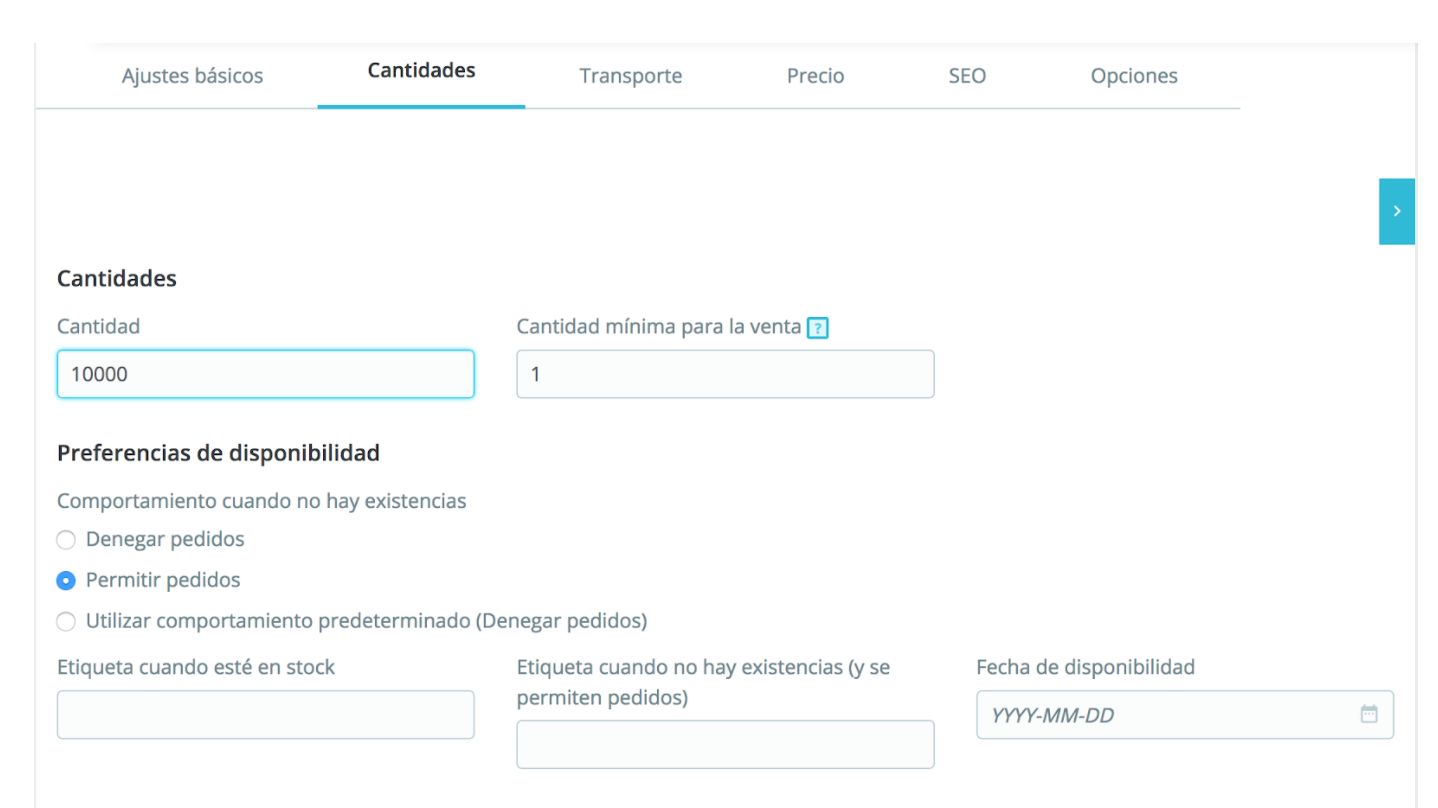
Here you should indicate the units available of a product and the minimum amount that will be required to acquire the customer for each order. In addition, you can set the behavior of the product when there is no stock: If it is available or not for orders and tags to be displayed in each case. If the product is not available, you can indicate on that date will be available.
Create combinations with all the variables of the article
If in the first step to the selected that your product has combinations, rather than show the quantity tab to will be shown the of combinations. Here you will have to create all possible product variables. You can see how to create combinations here
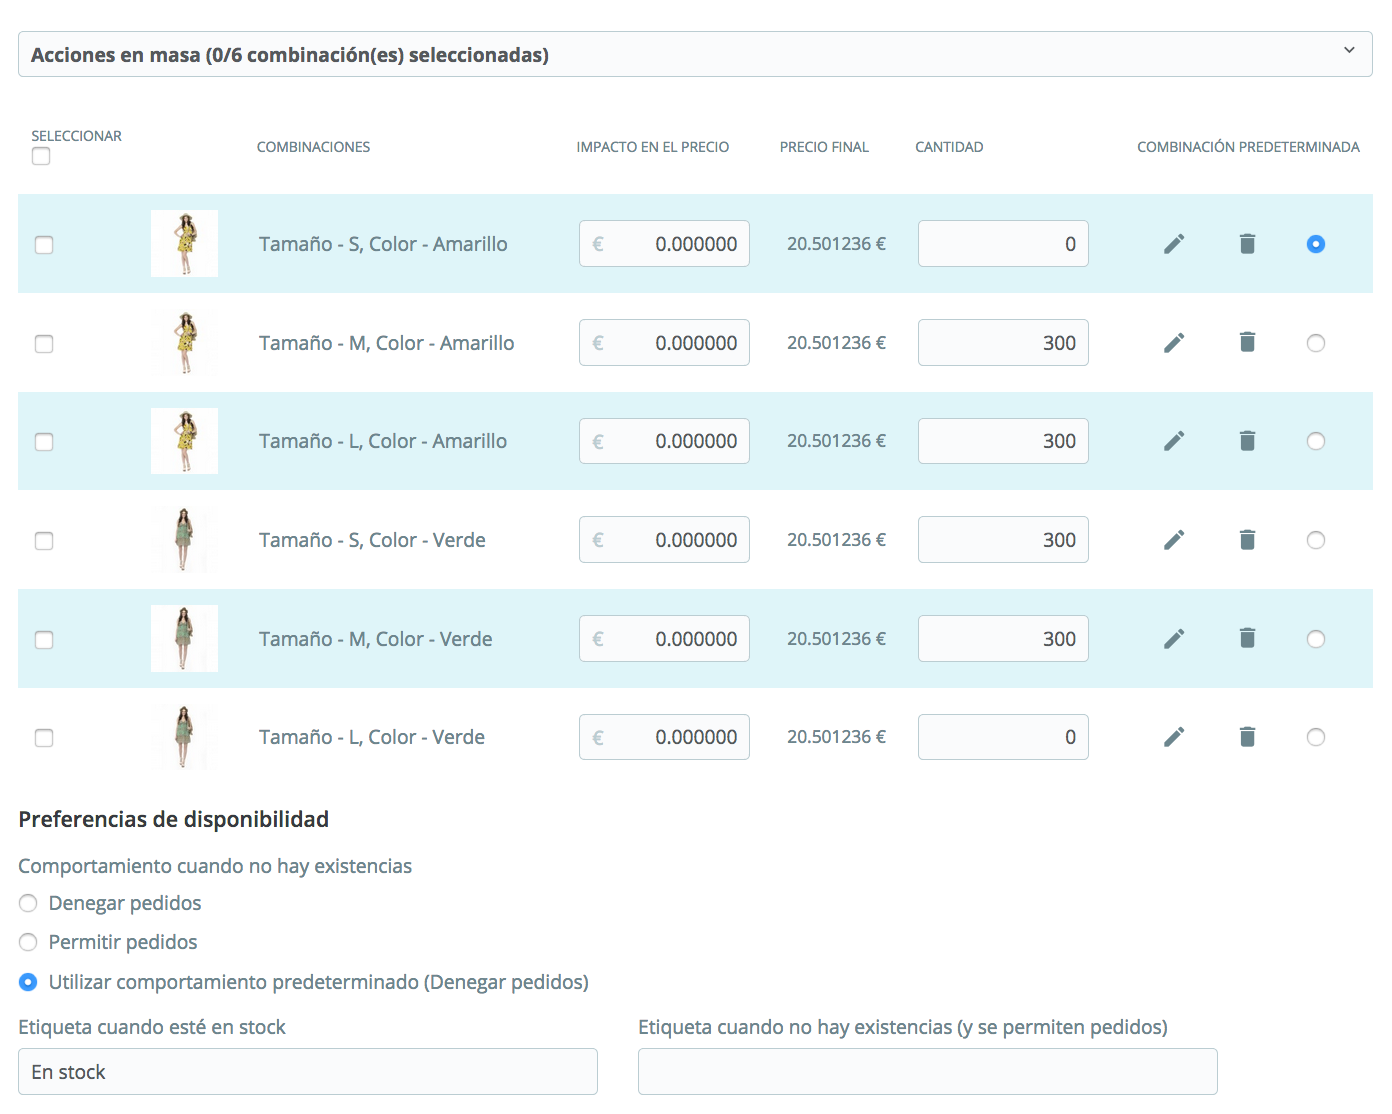
Here you can set the quantity, but in this case, for each combination. You can also specify the behavior where a combination is not available: If it is allowed or not to generate orders. In the same way you can add labels to inform the customer.
Indicates the package measures to manage the carrier
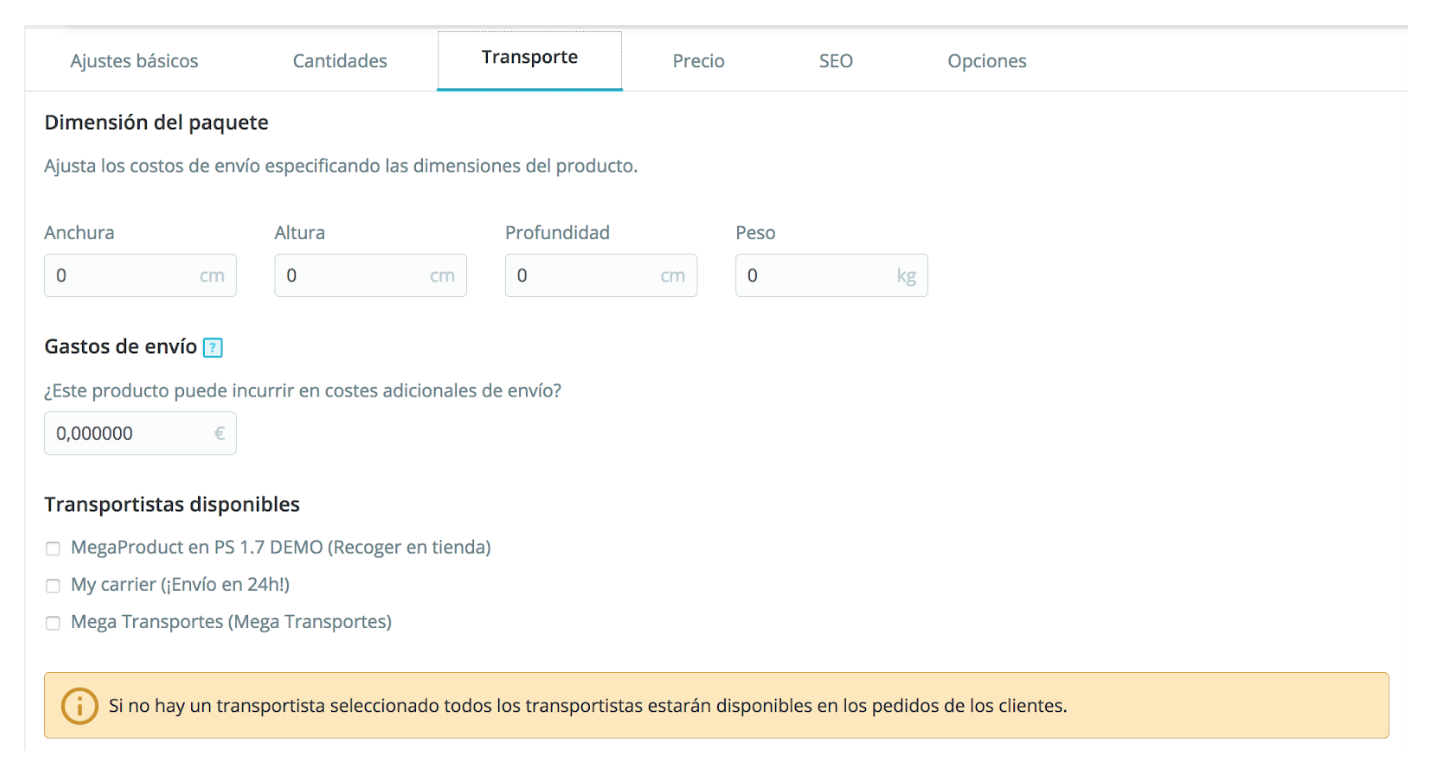
In this step, you must indicate package and weight measures, as well as the additional shipping charges if any. You can also select which carriers of your store are available for this item. You can see how to create and configure a carrier here.
It indicates the price of items in your ecommerce
In PrestaShop 1.7, you have several options to set the price of the products.
-You can indicate directly on the first tab, the basic settings, but it will be the same for all the variables of the product.
-In the event that the price varies depending on the variable, i.e., the combination, it will be in the tab combination where you have to specify each option supplements.
-If you have not indicated in any of these two sites, you can do it on the tab pricewhich is this.
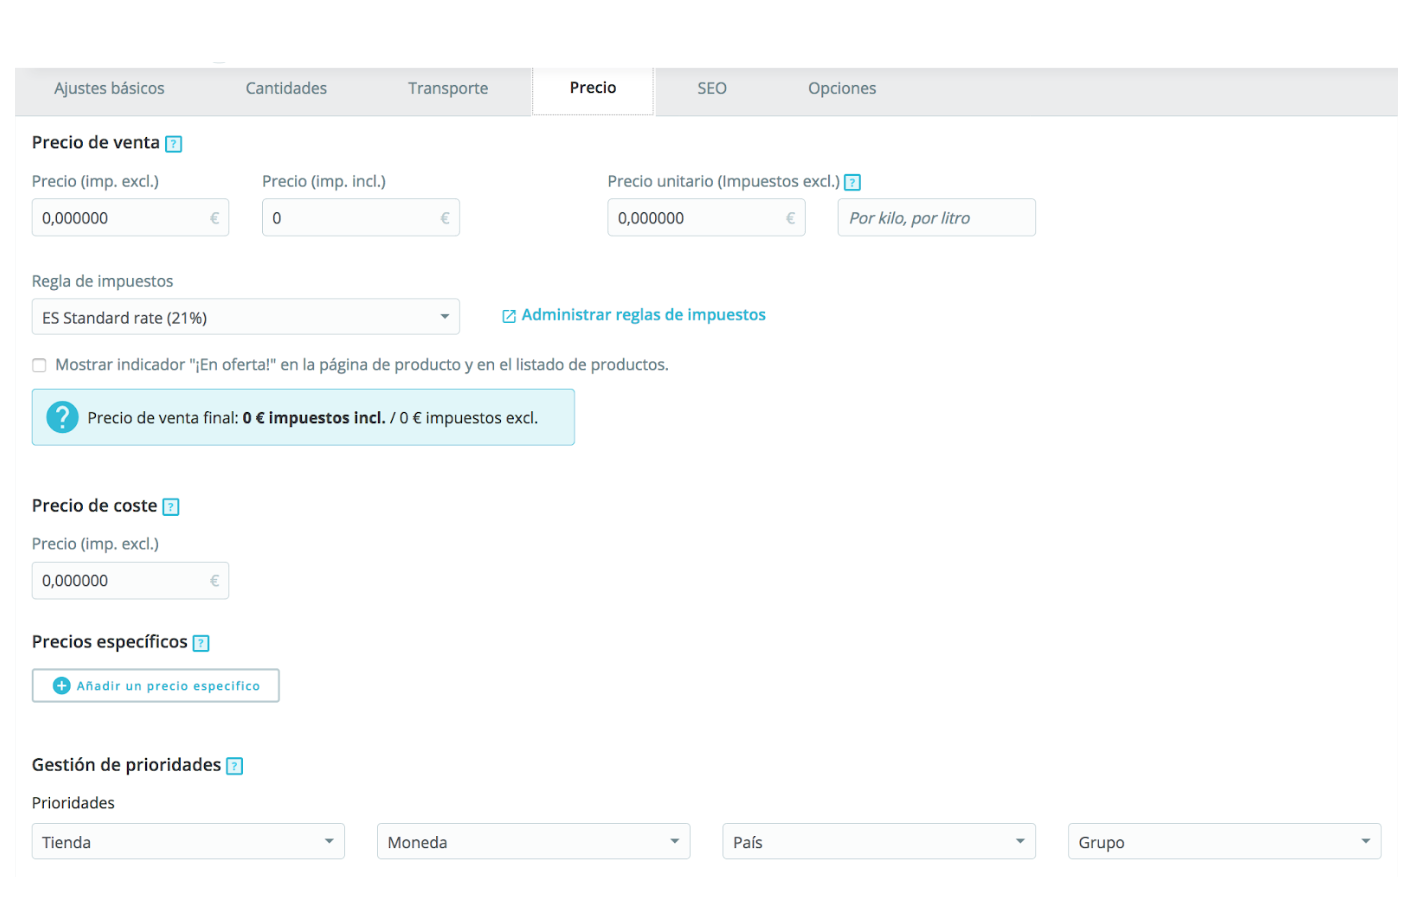
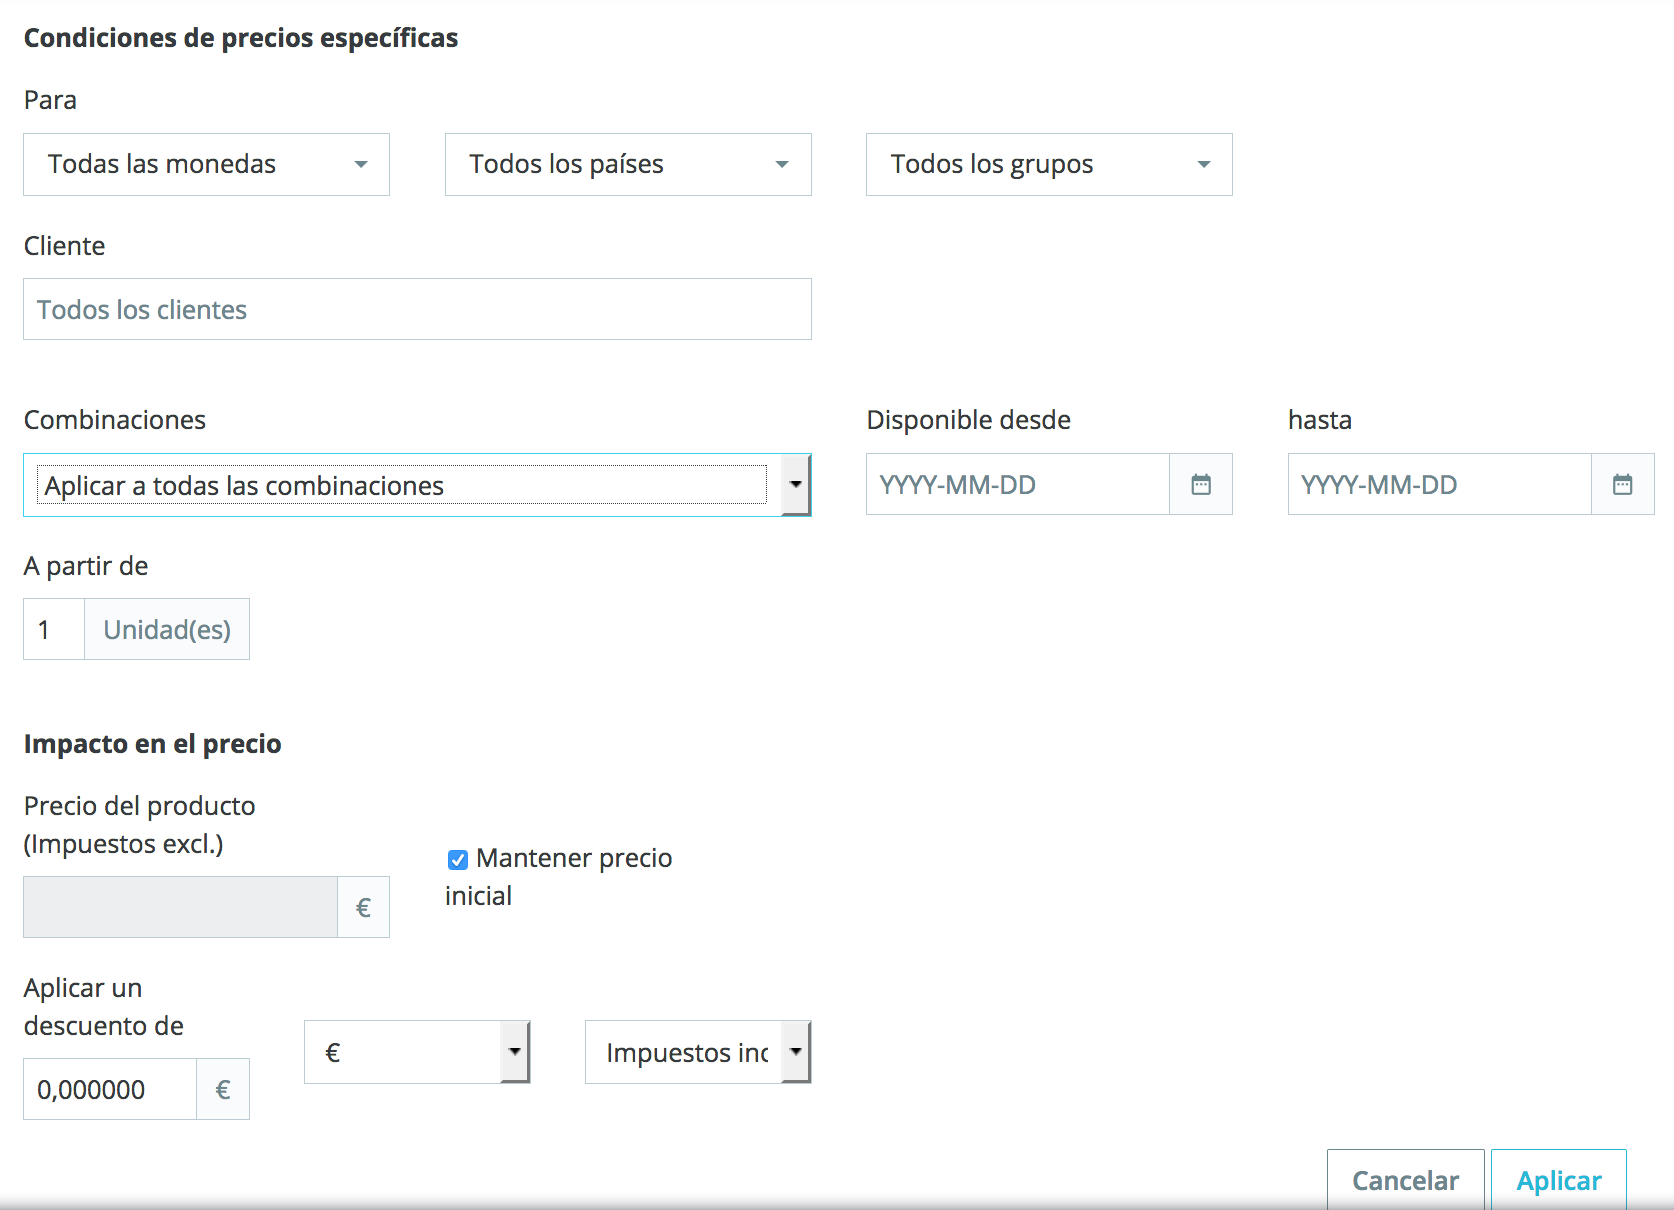
Here you can also add specific prices indicating whether it is active in certain cases:
-For all currencies
-For all countries
-For certain groups of customers
-For specific customers
-For all or some of the combinations of product
-Starting from certain units
-In a date specific
Prices may be both increases and offers on the final price, which may have included or not rates, and to be applied depending on the options selected. You can create all specific prices you want, just need to save a first price and to create as many as you need.
Improve the SEO of your PrestaShop adding descriptions
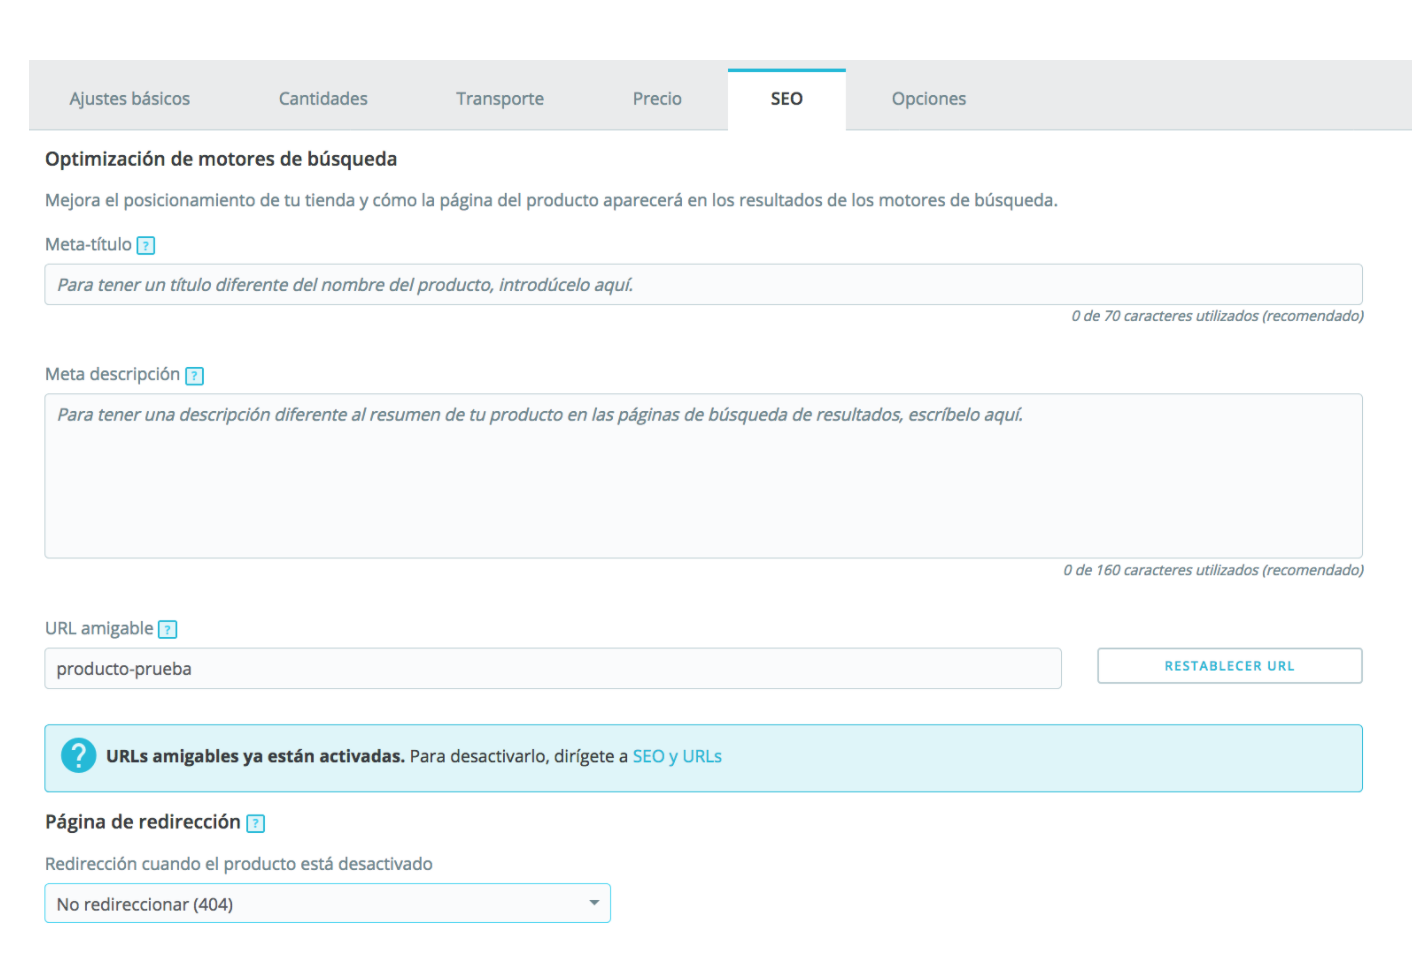
Here you have to enter the metatitulo (recommended 70 characters) and the metadescripcion (160 characters recommended) product. The friendly url is automatically generated to indicate the name of the product, or you can add it manually. Also you can indicate here the type of redirect that you want in the event that the product no longer available.
Complete the other options and you're ready!
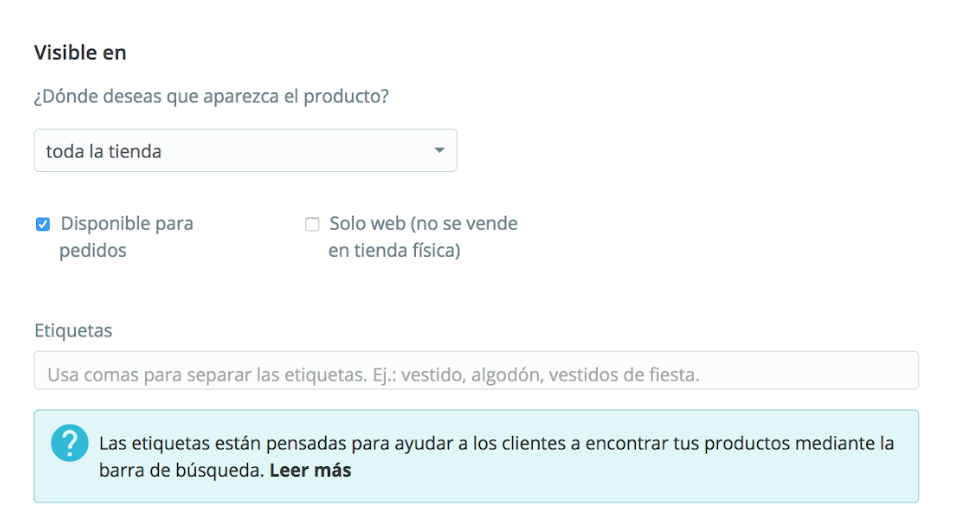
-Visible in: Here you can choose where will show the product within your store:
-Throughout the store
-Catalogue
-Search results
-Hidden
You can also indicate if it is available for orders or if it just is sold on the web.
-Status and references: The condition refers to the condition of the product: new, used or refurbished. And the references are used to differentiate the product from another: you can add barcode, EAN-13 code... which matches your product.
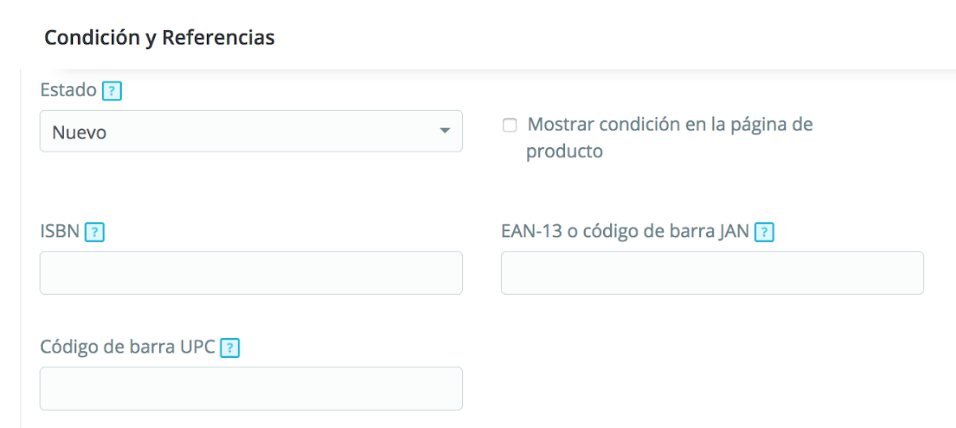
-Customization: The personalization field allows Add fields in the product page so the customer can upload files or to add text. You must take into account that within the module there is also an option to add this type of files, so it's not necessary to add them here.
-Attachments: If you want to add extra information about your product including manuals, video, comments, catalogues... you can do so here. You have to click on attach a new file and new fields are displayed:
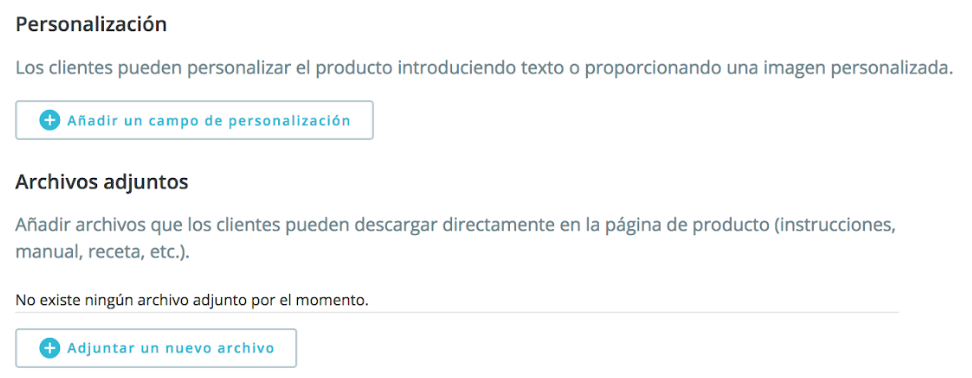
Treatment refers to the title of the file and the description you have to do a summary of the contents of the same. When finished click Add.
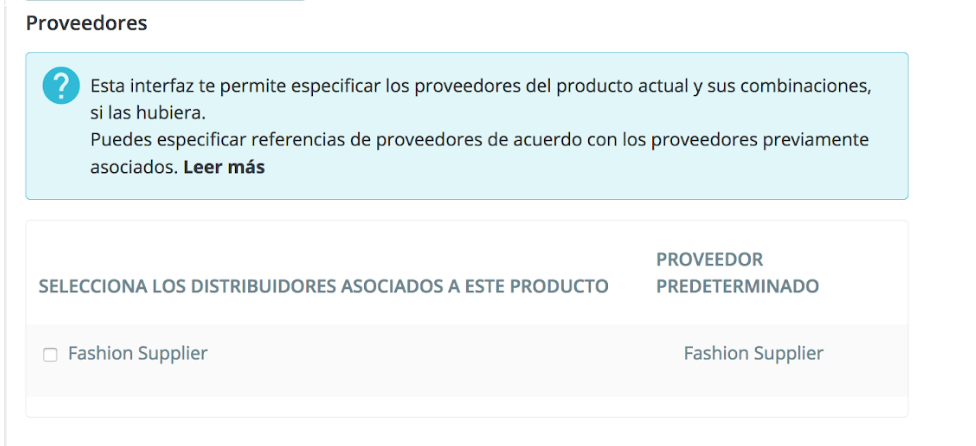
-Suppliers: PrestaShop allows you to indicate in the product suppliers and references by supplier. You can see here How to create new suppliers which will appear in this window so that you can associate them with the product.
When you have completed all fields your product ready to sell online and you can enjoy all the benefits offered by e-commerce. If you have any questions about how to sell your products or manage your PrestaShop wonder isn commitment calling 91 874 68 57 or by writing an email to acliente@alabazweb.com.






Escribe un comentario